Before today, taking measurements on the assembly line was painful — all of the available solutions have serious trade-offs in accuracy, cost, and throughput. For example, feeler gauge measurements done by operators are neither repeatable nor accurate. More advanced optical or laser equipment like Keyence or DW Fritz systems are not only expensive, but are either too slow to measure 100% of units or limited to pre-defined dimensions. What if you discover you need a new dimension that you didn’t anticipate? With no good solutions, engineers are left to be resourceful, directing urgent measurements to be taken with calipers or drop gauges and hand-written on paper — to be deciphered into Excel later. The status quo that hardware engineers put up with for on-line measurement is silly, and I’m happy to say that we’ve fixed it.
Today we’re proud to announce Instrumental Measure. With this feature, for the first time ever, engineers can measure almost any dimension from any stage of assembly of any unit, at any time, without physical access to the unit or factory. This capability is a game changer for product companies and manufacturers working to reduce schedule slips and increase yields because it enables engineers to quickly find and fix issues.

With Instrumental Measure, if a unit fails a test in a factory in China, engineers in the U.S. can measure parts and gaps just minutes later to find out why.

This is the next step towards our vision to modernize manufacturing, on top of the same image-based intelligent data tools our customers already use daily. In fact, over 50,000 measurements have already been taken during the Closed Beta. As one product design engineer told us, “It’s really easy. I was wondering why two units in [our factory in] China failed a test, and with just a few clicks, I found the answer by measuring a part.”
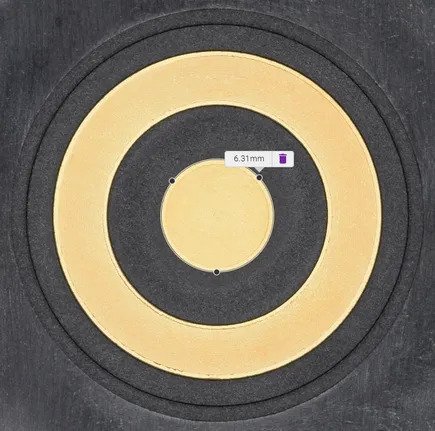
Instrumental Measure initially supports three measurement types: linear distances, diameters, and angles. Users of the Closed Beta have been able to check part alignments and cosmetic gaps, verify part dimensions on reliability failures, gain a better understanding of how two circular parts mate, and measure critical-to-fit dimensions with better accuracy than a line operator. Engineers have used Instrumental’s powerful filter tools to review specific units or lists of units to identify variation across time and build parameters.

Instrumental Measure typically achieves repeatability in the tens of microns, depending on the application. To achieve this, we use high-resolution images with proprietary processing that compensates for distortion due to lens warping, translations, and other effects. The result is a robust system relied on by product engineers at global brands and top-tier factories.
We’ve also published a deeper dive into measurement use cases that are not achievable with other measurement tools.
Contact us for a demo of Instrumental Measure, or subscribe below to receive news about more feature updates like this one.
Related Topics


