


Since we started doing teardowns, we have consistently asked for feedback from our audience on what to open up next. Without fail, multiple people write in each week to request a drone. Doing a little bit of research into drones, we were surprised to learn that DJI has about 70% market share of the consumer drone segment. So for this Change Notice Unsnapped, we decided to open up the DJI Mini 2! We were intrigued by its small form factor, tons of tech, and the fact that it is a freaking drone.
Along with Tobias and myself, on this episode of Change Notice Unsnapped, we were joined by Taylor Dixon of iFixit. You may recognize him from their videos opening up the latest tech and rating their repairability. Taylor is an avid drone enthusiast flying Point of View drones on the regular. I also took the opportunity during this teardown to show off and use the latest iFixit Pro-Tech teardown kit and Magnetic Project Mat both of which were really helpful during the teardown.
We started with an overview of the drone highlighting some interesting features. One of the distinguishing characteristics of the mini 2 is that it weighs less than 250 grams which is the limit the FAA sets for requiring registration. By being just under that weight, DJI reduces the friction to getting started flying. However, the Mini 2 does make some compromises in the design. It is apparent that the DJI engineers went to great lengths to stay under the weight limit including reducing the number of sensors and swapping the quick change propeller blades for lighter direct screwed ones.
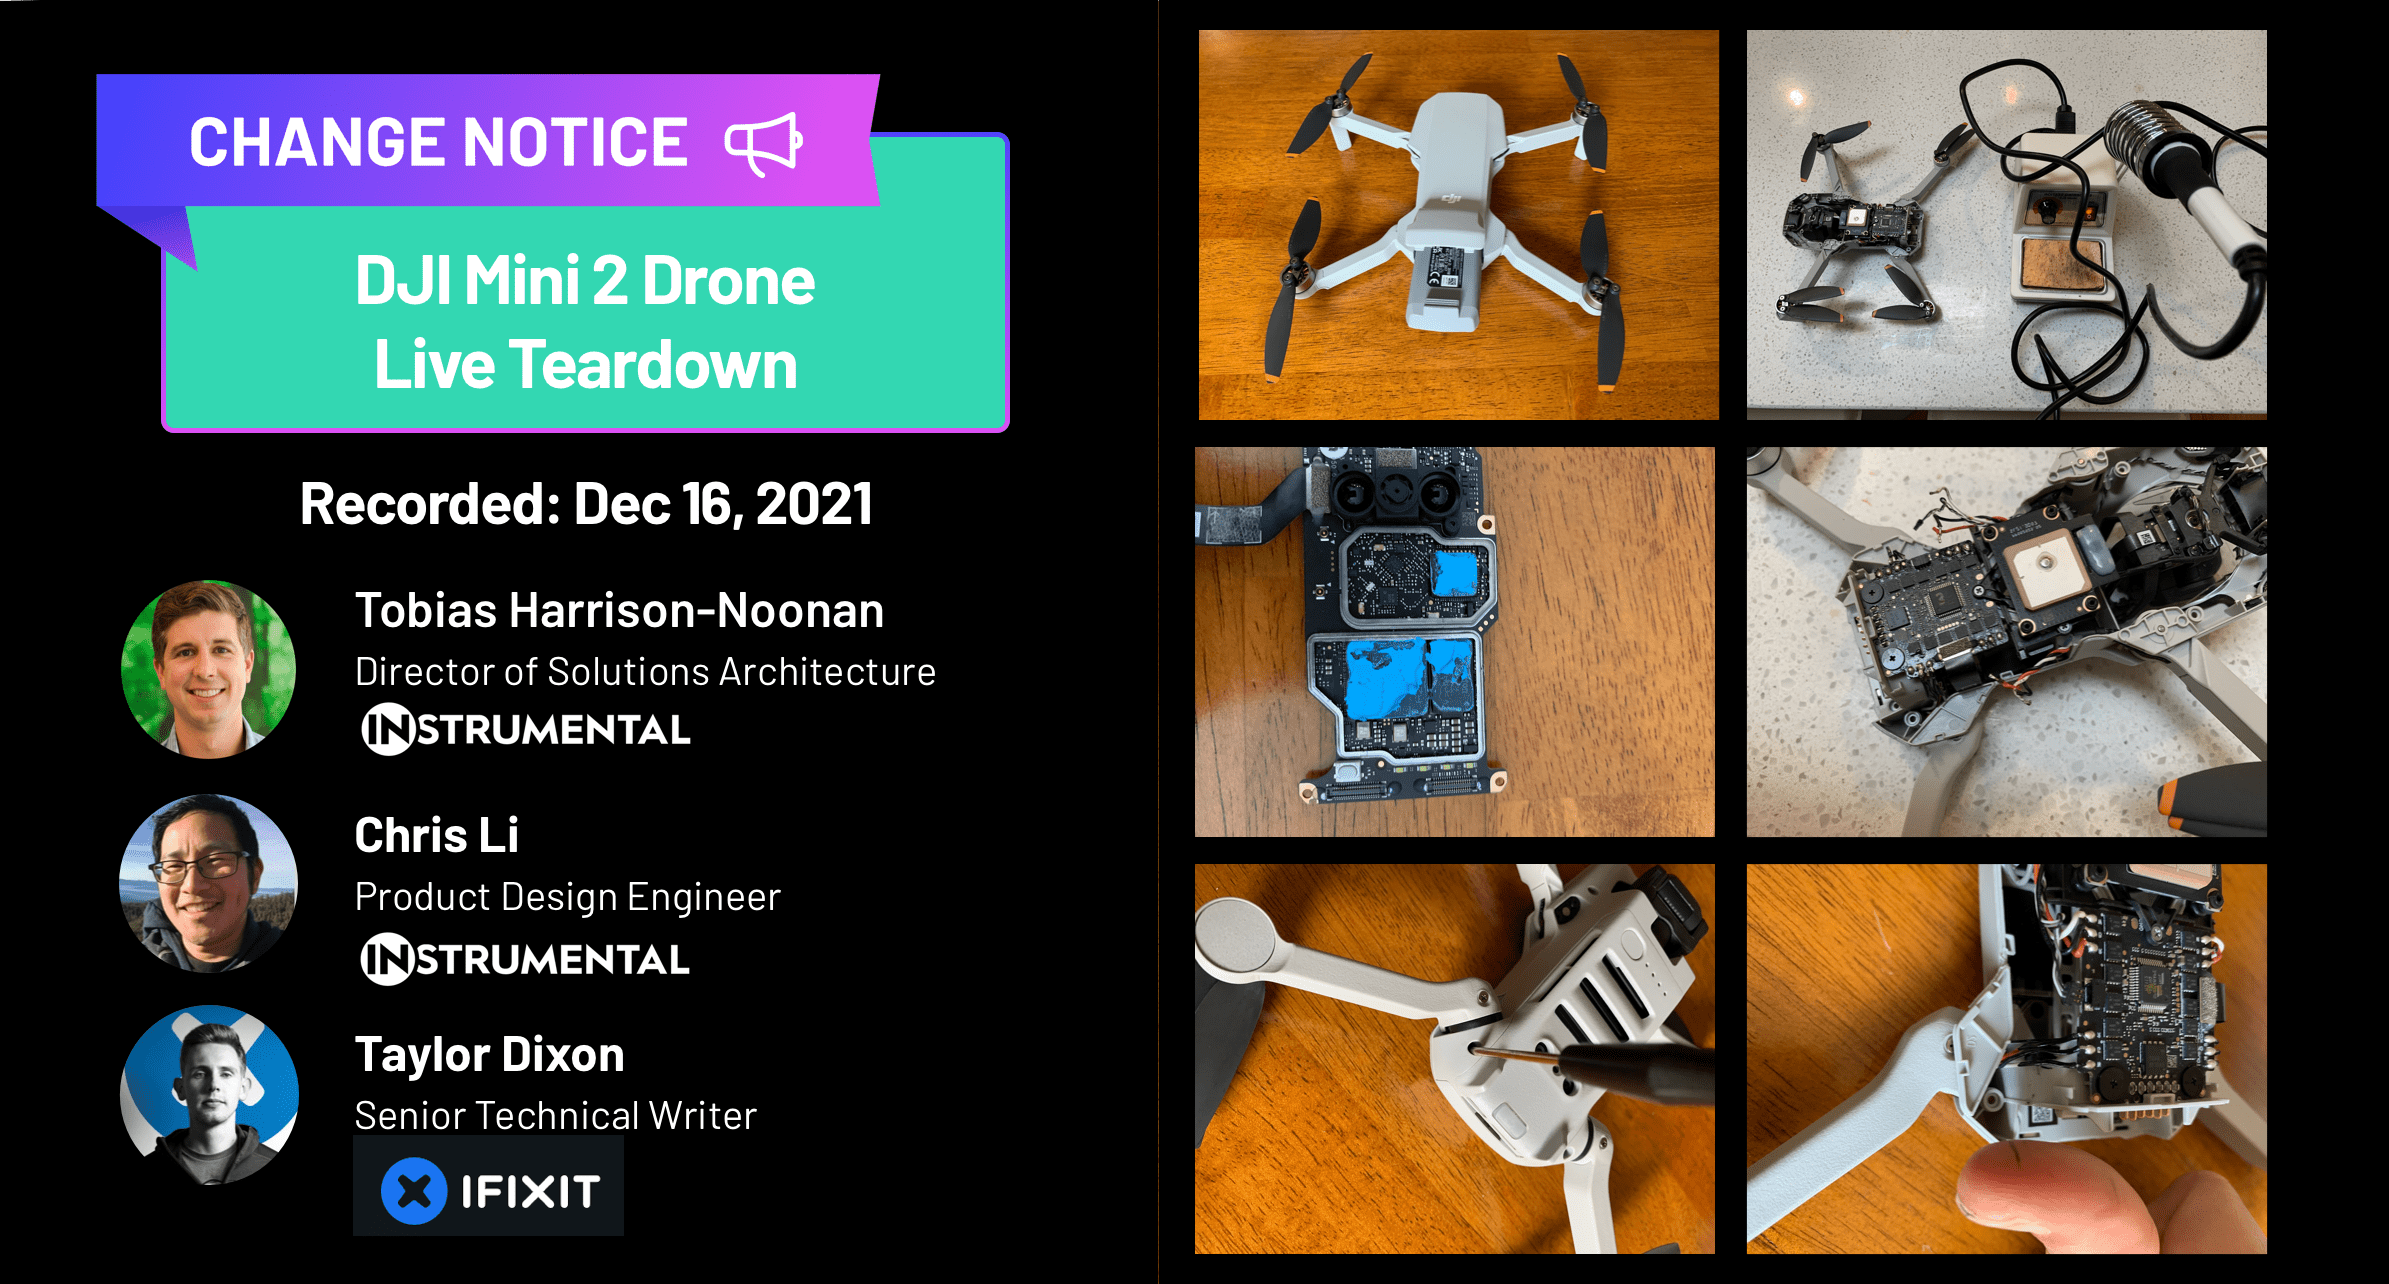
Drone Propellers are individually screwed in on the Mini 2.
The drone has 4 arms: the front 2 swing outward and the rear 2 unfold underneath. This creates the necessary separation so the propellers don’t interfere with one another. Around front we see the camera on a single axis gimbal system and underneath we catch a glimpse of 2 sensors. In back of the drone we find the removable battery, the microSD card slot and the USB-C charging port.
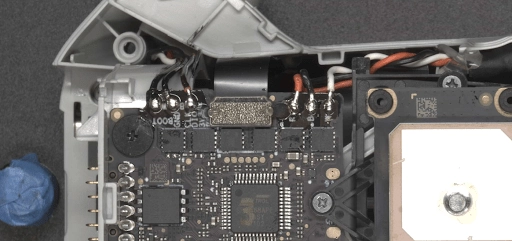
Because the plastic walls were so thin, I started with the main top housing unscrewed and unsnapped. This allowed us to easily get into the product and immediately we can see the power and motor control boards as well as the GPS and gyroscope module. The GPS module sits on a compliant rubber damper isolating it from the vibration of the main body of the drone. We also point out a few hacks in the corners with what looks like black ink, black tape, and black foam over the new front indicator light and surrounding vents at the front corners.

Top view of the power board, GPS unit and Camera Gimbal system
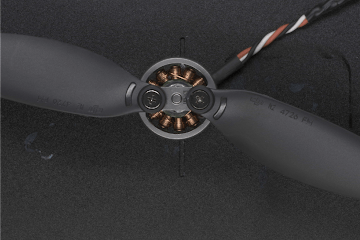
Switching to Instrumental, we take a closer look at some of their design choices. Immediately we see that the motor wires are soldered directly on the board instead of using connectors. Taylor let us know that most drones are built this way to reduce weight and maintain the strength of the connections. We also zoomed in on the board-to-board connector between the power board and the main board. DJI has added 2 drops of glue on either side of the connector and included a conductive foam piece behind. Taylor with his repairability hat on sighed and said that unfortunately, the glue is common because of how roughly drones are treated – being constantly under vibrational loads and the occasional crash into the side of a building.
Close up of the glued connectors and soldered motor wires
Back to the teardown, I unscrewed the 2 screws holding part of the bottom cover on and unhook the snaps on the perimeter. We are greeted with a large but thin aluminum shield. A further 3 screws remove that to reveal lots of blue thermal paste. Removing some cables and connectors I am able to remove the board. Opening up the shield cans, we find thermal paste on almost every single IC. This is not too surprising given the constant loads the product would need to be under recording 4k videos, in constant RF communication to the RC controller and spinning the four propellers constantly.
So much thermal paste! The drone must be processing a lot of information at all times of operation.
The thermal paste gave us an idea to compare this solution with the Nest Doorbell (battery) which we also opened up recently. There they used a similar large shield to dissipate the heat. Though unlike this drone, there were only a few major components that required the heat spreader.
Through the instrumental app, we were also able to get a closer look at some of the chips and landing sensors. Underneath the plastic lenses were a pretty straight forward IR LED and receiver pair. Taylor told us that on higher end models DJI uses more accurate ultrasonic sensors, but to keep the weight and cost down, they went to a simpler solution here. Tobias also noticed extra traces for another board to board connector that was not populated for our production version. We speculated that DJI may have wanted to incorporate some other obstacle avoidance sensors but abandoned that at the last minute.
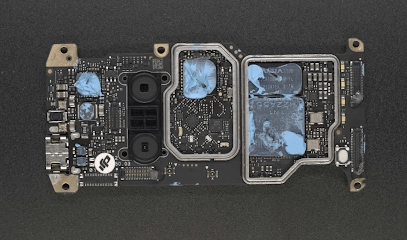
Main board without shields. Thermal paste on every IC, IR sensors, and unpopulated connector are visible.
After looking at most of the major components, we turned to the audience to find out what they wanted to see next. The options were the antenna placement. The camera module, and the arm mechanisms. More of our rather vocal audience were interested in the antenna locations so we switched back to the live view and I followed the antenna cables to the front arms. On the vertical feet of each arm, we found a small snap-in plastic component. After struggling a little bit, I was able to pop that out and reveal a small antenna. The long cable snakes through the arm and joint back into the main body. This is a clever way to keep the antenna away from the noisy electronics. The motors could also generate some noise, but the antennas are pointed perpendicularly to the field and separated by some distance. Also, a warning to all you drone enthusiasts, if you think you’re going to break your drone, try to keep the front arms intact.
We finished the session by looking at the gimbal mount on the camera. With soft durometer rubber, the camera is loosely held in place at the front of the drone. Snaking over the gimbal assembly is a cable bundle which terminates into one of the connectors to the main board.
Overall, this was a fun teardown. With enthusiastic audience members and a knowledgeable guest in Taylor, I learned a lot about drones. DJI has done an incredible job in creating drones for different market segments and the mini 2 with its low cost and reduced barriers to flying is sure to be a popular holiday gift.
Chris Li is a former Amazon Product Design Engineering Manager and teardown lead for Instrumental. He brought multiple generations of the Kindle to market and advised on the first Echo and Fire TV products. He also worked as the VP of Product Design at the healthtech startup, PillDrill, which shipped an award-winning medication tracking system. Recently, he joined Agtonomy, an autonomous tractor startup, as a Mechanical Designer.
View the recording of our DJI drone teardown below:
Author
Related Topics