

Apple products have always been held as the gold standard of consumer electronics design with almost impossible manufacturing processes and incredible engineering executing on an exacting industrial design. So when a new product is released, fans and haters alike are eager to see inside and gawk at the work that went in to every machining mark and engineering decision.
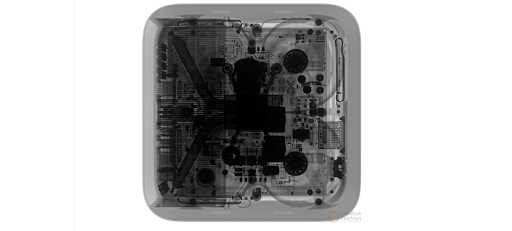
X-Ray courtesy of our friends from Creative Electron
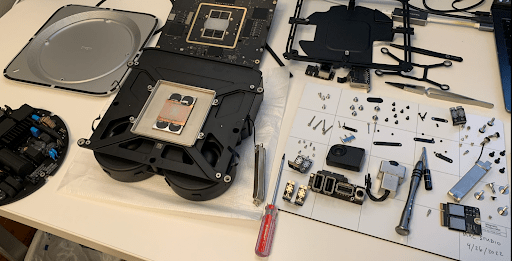
Start of teardown
We chose the Mac Studio for this teardown because of its cachet and more specifically because it is the first computer designed around the M1 Ultra chip. We heard there were some massive thermal solutions to see. The X-ray images alone from our partners at Creative Electron showcase an almost quad-copter like fan system! Tobias and I were both excited to open up the product and catch a glimpse of how Apple made this incredible computer.
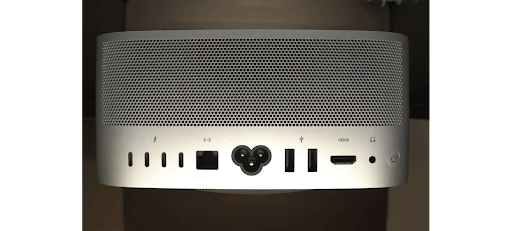
Rear view of the Mac Studio with the wraparound hole pattern and numerous ports
Taking a look around the product, the Mac Studio appears to be a monolithic block of aluminum. In a nod to its more “Pro” use cases, the surfaces are only broken by the large wrap-around vent pattern in the back and numerous ports for the power user including 6 USB-Cs and an SD Card slot.
Apple was one of the first consumer hardware companies to consistently insist on reducing or removing visible fasteners on their products, and this computer is no exception. With just a single split line hidden underneath the main body of the device, it was daunting at first glance to see how to open the product. But underneath a single molded plastic ring affixed with adhesive, four large Torx screws hold the machined aluminum foot to the rest of the computer.
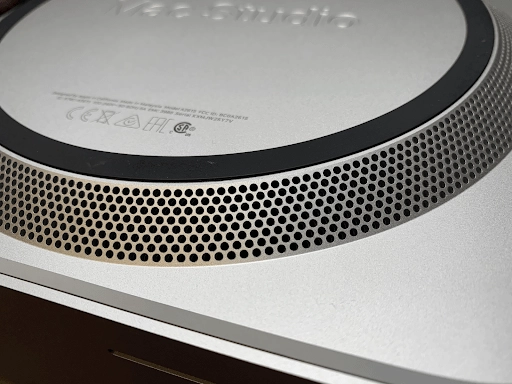
Close-up view of the bottom foot of the product with the drilled hole pattern
The foot itself is quite interesting with its precisely machined hole pattern of more than 1500 holes drilled at a 45 degree slope. In addition, a seamlessly integrated plastic ring on the bead blasted surface surrounds the entire part. Taking a closer look with the Instrumental platform, we focused on a couple of interesting nuggets that might have slipped past other reviewers.
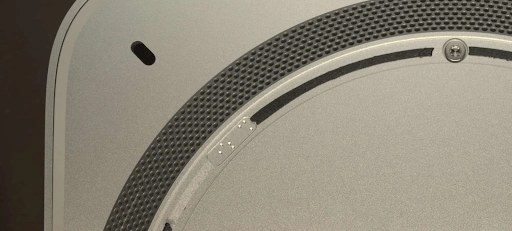
Curious machine marks at the upper left corner of the foot concealed by the plastic ring.
One was the unique machining marks that almost looked like negative braille dots on both the front and back of the part. While non-functional, we suspect that they are actually a hidden date or machine code to help with part traceability. While other manufacturers might have attempted to stamp or forge this part to net shape, Apple clearly chose to machine this part to achieve tighter tolerances and better planarity. Knowing that, they created a system to clearly and easily identify what day a part was made and what machine made it. If defects are found at a later date, they can quickly isolate other parts made by the same machine.
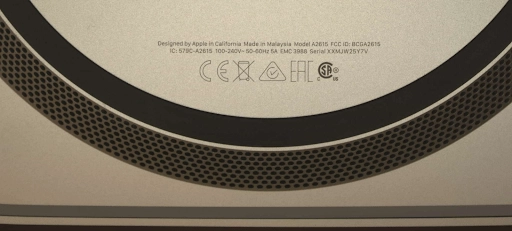
Designed by Apple in California but made in Malaysia
In addition, the bottom of this plate shows the traditional “Designed by Apple in California” moniker but this is the first time, one of these high end products has also sported “Made in Malaysia.” Perhaps this is a bid by Apple to diversify supply chains or possibly this is a way to avoid tariffs on goods made in China.
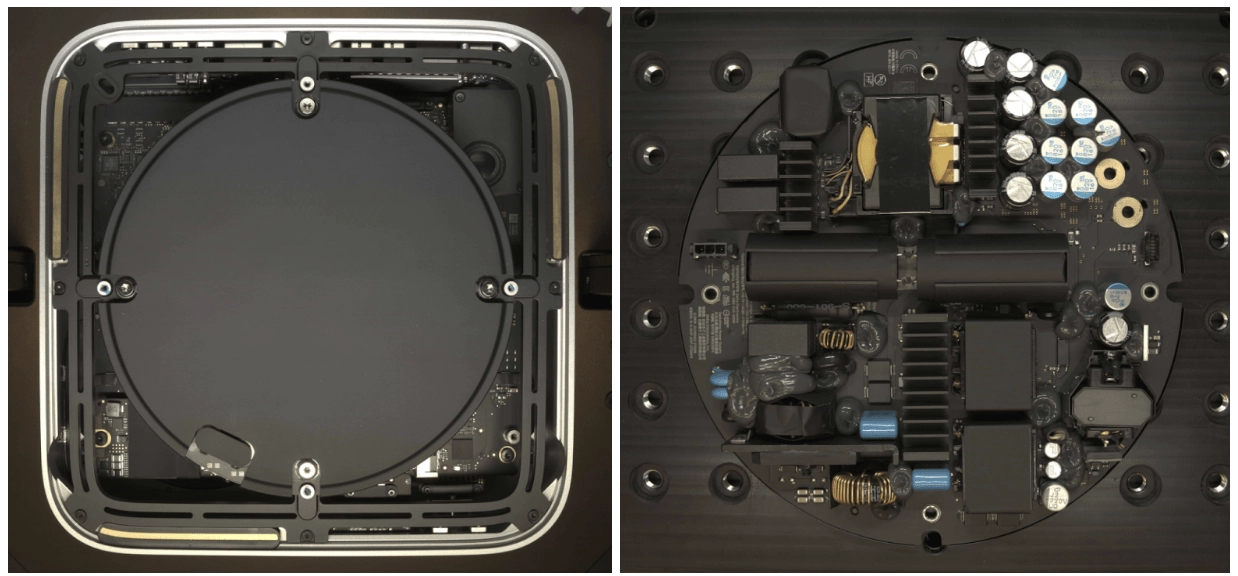
Power supply unit directly under the machined aluminum foot
After removing the bottom foot of the device we are immediately greeted with a large circular circuit board with a matte black plastic cover. Also visible are the three main antennas on the perimeter of the product which helps explain why the designers went with a plastic perimeter on the aluminum foot. Held on by another 6 screws and two connectors it turns out to be the main power supply of the product. Tobias explored the board using the Instrumental platform while I removed some of the many screws in the product to save time. The black plastic cover is both an aesthetic choice and a way to insulate the high power components from the metal chassis. Large swathes of black epoxy help isolate components from one another to prevent shorting.
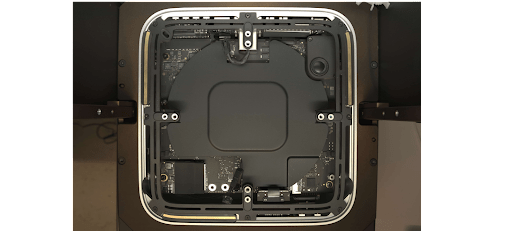
Internals view of the Mac Studio
Once the power supply is out of the way we remove the perimeter inner frame to expose the main guts of the computer. Here is where the teardown slows to a crawl. To remove the main PCBA, I need to take out all the ports at both the back and front of the device as well as the antennas and the SSD. Most of the ports are on their own flex cable and screwed into the aluminum housing with different size Torx heads. While this takes a lot more effort to assemble and leaves more room for error if a screw is missed, it does allow for the smallest possible tolerance loops. Additionally, each flex cable is covered by a stiffener which is then screwed to the board.
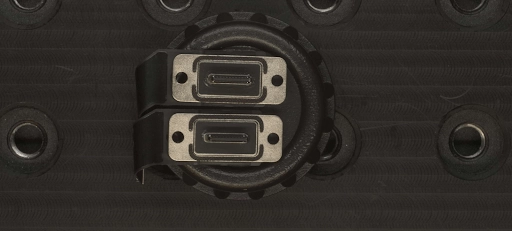
Close up view of one set of USB-C ports. Note the lack of a connector body.
The USB-C ports were rather interesting because Apple engineers chose to screw each of them in individually with their own pin and slot. The reason for this became clear when we removed the connector to find no structural housing. Instead, Apple relies on the aluminum chassis to serve as the main body of the connector!
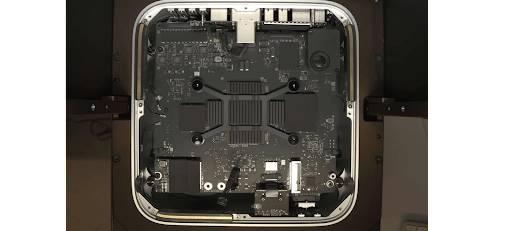
Internals of the Mac Studio revealed
While I toiled away removing more of screwed down components, Tobias explored some other design choices by the Apple team and fielded some of the many questions from our audience about some of the manufacturing processes. The heat-sink on this side of the board is held down by a massive formed spring but curiously the chip does not lie on this side suggesting that the component emits quite a bit of heat to require additional heat sinking on the back side. Some shielded components are also layered underneath some precisely cut black tape making clear that the industrial design team had strict design requirements for the inside of the product as well as the outside.
We also noticed one of the antenna cables seems to snake all the way underneath from the right side and is bolted to the board. Antenna performance and placement is critical as we have seen with some of our other customers and Instrumental has been super useful in both recording and identifying correlations between antenna performance and placement.
Once I finally removed enough components, I was able to slide and tilt out the main PCBA. Flipping it over reveals the huge fans and heat sink on the back that flow into the large hole pattern out the back. I removed the tight spring on the back and four additional screws on the perimeter to separate the main thermal solution which includes large blocks of aluminum and copper along with two massive fans and several heat pipes channeling heat away from the M1 chip.
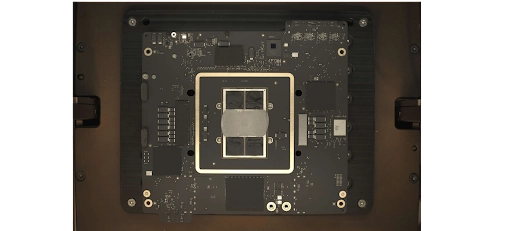
Bottom view of the Mac Studio main PCBA
While we didn’t spring for the M1 Ultra for this teardown, the back of the PCBA clearly shows the outline of how large that chip actually could be and why it might need an even more intense cooling solution. As we were nearing the end of the hour of this teardown, we quickly flashed through a few of the design elements of the thermal system including the fans and heat pipes.
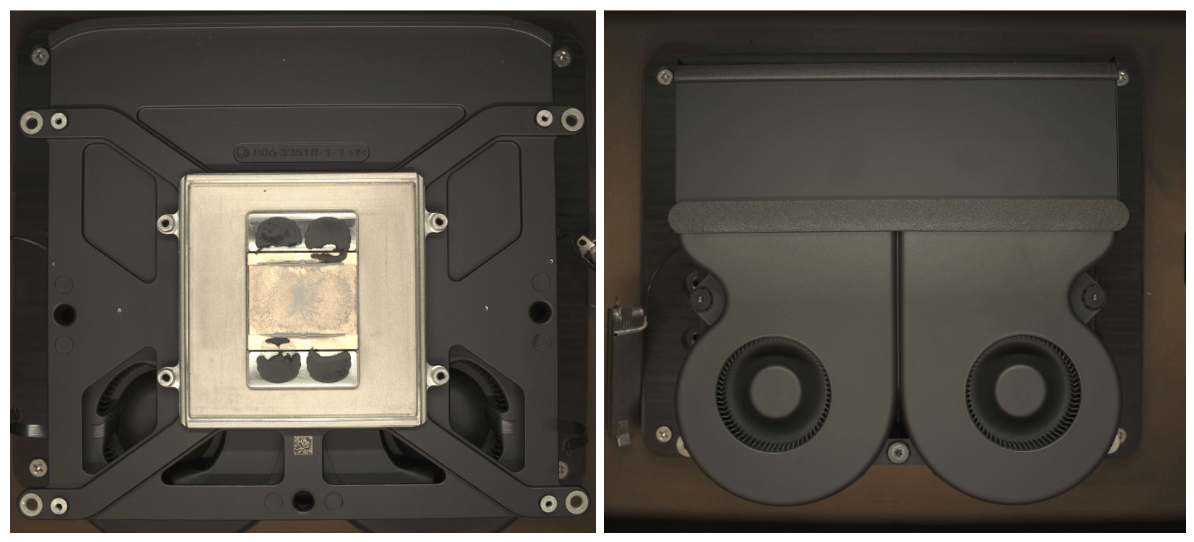
Thermal assembly above the M1 chip from the bottom and top views
And with that, the teardown was complete. I did have to put this all back together but the job was made easier thanks to iFixit and their magnetic project mat!
Completed teardown
Tobias and I had a lot of fun with this teardown because there were so many different things to geek out on. We were both a little sad to have to cram all that we learned into a single hour but if you are interested in a deeper dive into any of the components later, let us know! We may also have some opportunities to meet us in person and take a look through some of these components at our upcoming live teardown in June. Also if you want access to the teardown library with this image and our other devices from this Change Notice series, contact us at sales@instrumental.com:
Chris Li is a former Amazon Product Design Engineering Manager and teardown lead for Instrumental. He brought multiple generations of the Kindle to market and advised on the first Echo and Fire TV products. He also worked as the VP of Product Design at the healthtech startup, PillDrill, which shipped an award winning medication tracking system. Recently, he joined Agtonomy, an autonomous tractor startup, as a Mechanical Engineer.
Author
Related Topics