
During the pandemic, a lot of people have been working from home and have invested in upgrading their home sound systems. Sonos has benefitted from this surge in demand, offering a wide product lineup to create an immersive whole-home audio experience. We chose the Sonos One because it was one of the first independent speaker manufacturers to offer third-party voice assistant support for Amazon’s Alexa and Google Home, and we were curious how they put it together.
In this episode of Change Notice, ex-Apple engineer Tobias Noonan-Harris and I opened the Sonos One (Gen 2). While much of the teardown was done live, Tobias also showed off some of the capabilities of the Instrumental system allowing the team to dive deeper into the boards and assemblies.
To get into the product, I pried up the rubber foot and unscrewed 4 rather tight machine screws. These screws had so much threadlock on them that I needed to add a lever arm to my iFixit screwdriver just to get them started. Once the bottom cover was off, I was able to remove the bottom plastic housing and slide off the sheet metal cage surrounding the speaker. After peeling back the pieces of black tape on the housing, I unfastened 4 screws holding the top housing and microphone board in place.
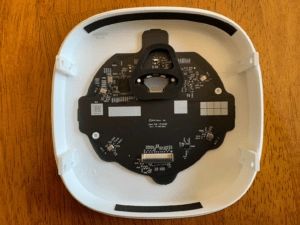
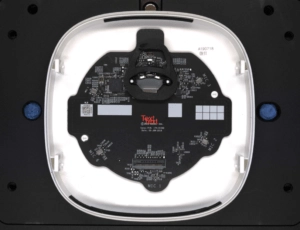
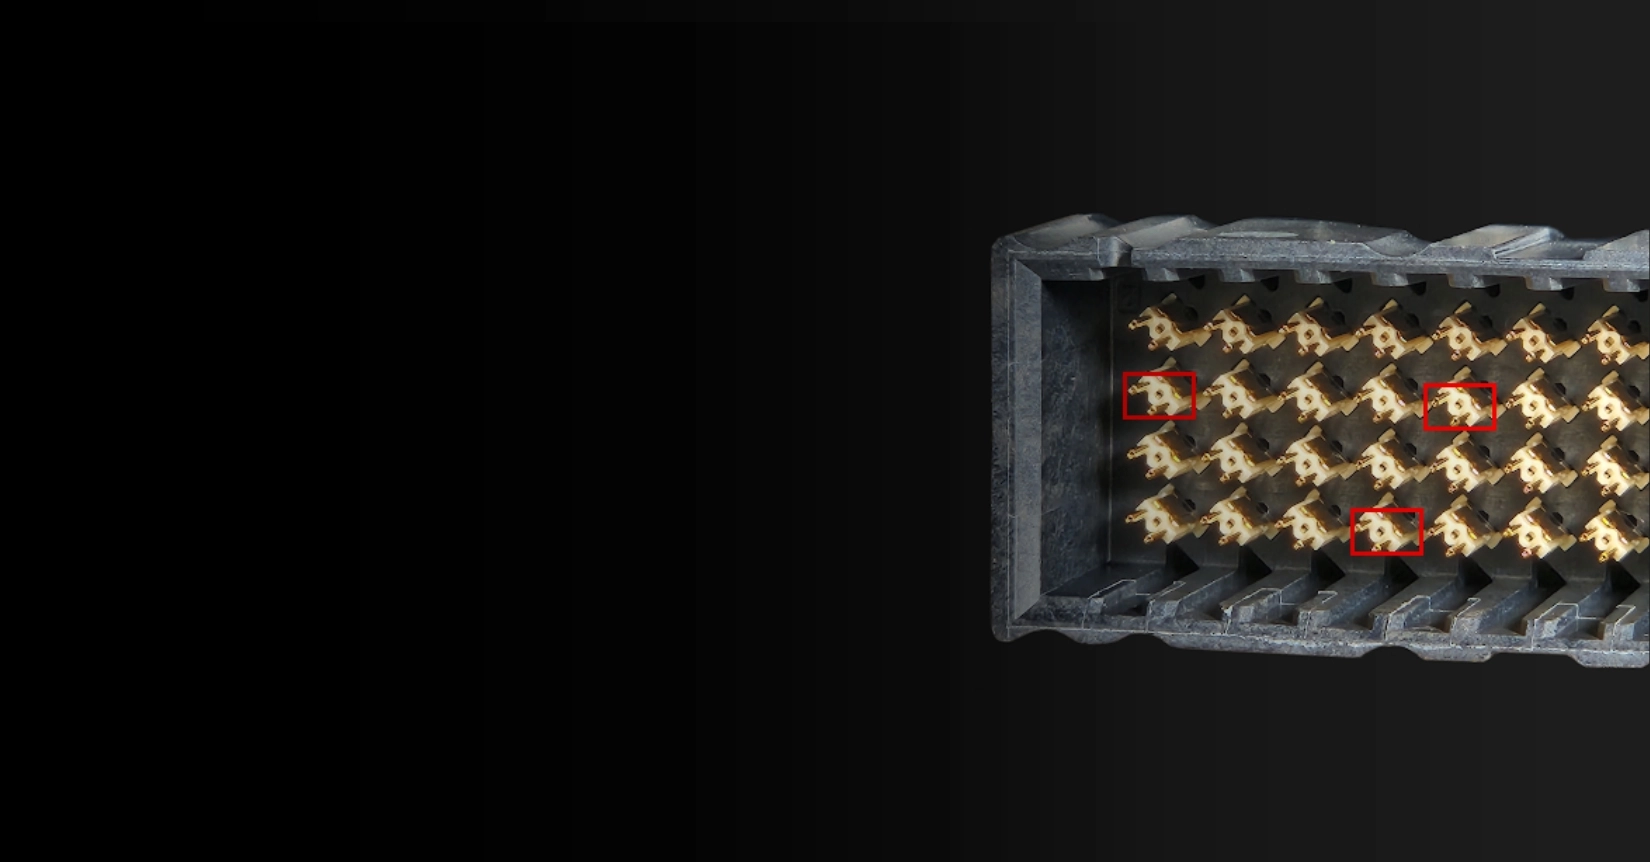
Version differences between MIC PCBA from live teardown version and Instrumental pre-teardown version – note the missing “MIC 1” designator and components on the bottom tab of the board.
Here we noticed some of the differences between the product in the live teardown and the one captured earlier on the Instrumental platform. From the different date codes on the boards were pieced together the evolution of the design from its initial production release in 2018 to a revision in 2019. We suspected that originally this board had 6 different microphones because they are clearly labeled on the solder mask. But only 4 were ultimately required to integrate with the virtual assistant software from Amazon and Google, so not only were the components removed for the production ramp version, but the board was updated to remove the traces and through holes for the version that I opened up on camera. The Sonos team likely made the decision to remove the microphones too late to make changes to the first production run having had to qualify the product for certification at DVT and placed orders to meet the PVT schedule. Later, they determined it was worth the time and expense to implement these board changes and other improvements to lower the overall BOM cost for the rest of the product’s life.
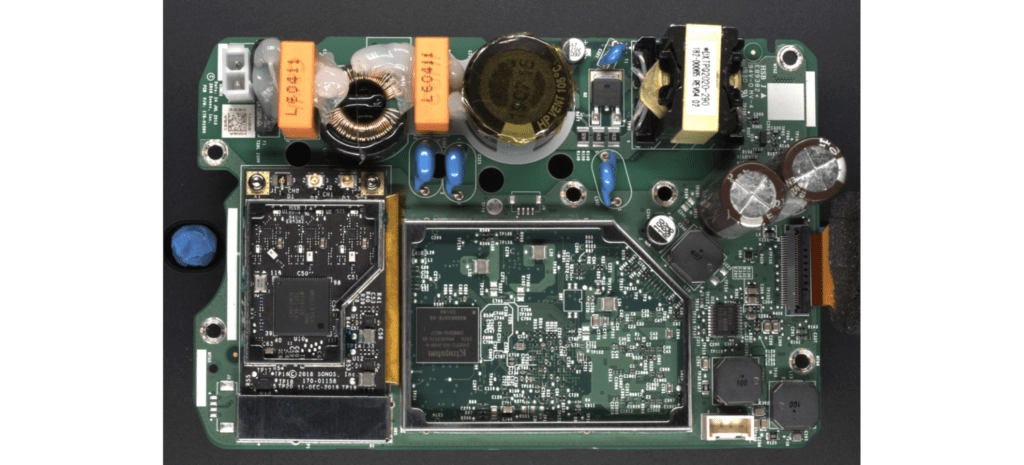
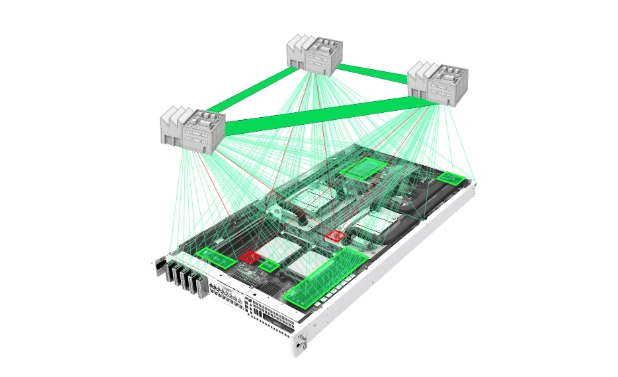
After shifting back to the live teardown, I removed a further 6 screws to open up the back of the speaker chamber revealing the main guts of the device. We discussed the copious amounts of hot-melt glue on the main power components and asked the audience what their thoughts were. Several people suggested that the glue was being used for sound or vibration dampening and electrical protection for an adverse drop event or long term reliability. We agreed, however, with glue variability being an issue that many Instrumental customers face, we also discussed how Instrumental’s machine learning algorithms help catch problems in the factory before they escape. (To learn more about glue issues and how Instrumental can help, check out a recent webinar from our Change Notice page.) Tobias showed more of the detailed view on the Instrumental platform and then I showed the backside of the board and the large aluminum heat sink. Great questions from the audience drove the discussion with some interest in the 5 thermal pads on the heatsink and the foam gasketing around the perimeter.
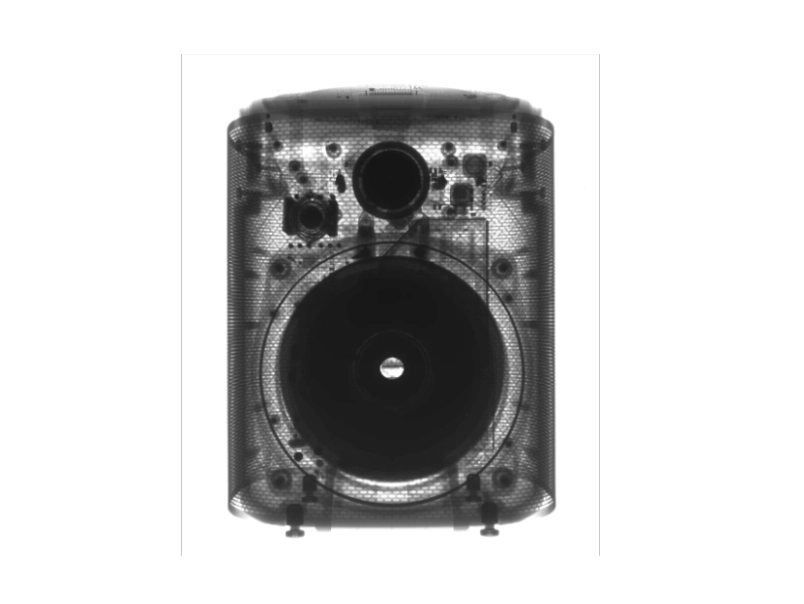
X-ray image from the front of the Sonos One courtesy of Creative Electron – the large woofer speaker dominates the width of the housing making it a critical part in determining the size of the product.
For the last leg of the teardown, the audience requested to see the X-rays, speaker architecture, and antenna design. We explored 3 images provided by our friends at Creative Electron and discussed some of the architectural layout. We also quickly reviewed the 3 antennas before we ran out of time on the official recording. I continued to take apart the speakers and explored the unique welded housing design in the off-the-record Q&A session after.
If you missed this session, take a look at the teardown video below.
Also if you don’t want to miss the off-the-record discussion, be sure to attend future Change Notice episodes live and stick around to the end. We will have more teardowns and guest speakers soon so watch for the coming episodes as we open up other products and talk to engineers tackling some of the most interesting problems in the consumer electronics industry. If there’s a product you want us to open, send us a suggestion at sales@instrumental.com.
Chris Li is a former Amazon Product Design Engineer and manager and current teardown lead for Instrumental. He brought multiple generations of the Kindle to market and advised on the first Echo and Fire TV products. He also worked as the VP of Product at a small healthtech startup, PillDrill, which created an award-winning medication tracking system.
Author
Related Topics