

Support / How do I automatically measure features?
Measurements play a critical role in failure analysis. Without precise data on relative placement of each component within a unit, identifying the root cause of a problem and implementing an effective solution can be impossible. This is where Instrumental’s Measurements feature comes in, enabling engineering teams to retroactively measure any dimension quickly and easily.
Table of Contents
Creating a Measurement
Use the three point distance tool on the left hand side of the Explore Page to begin setting up a measurement. Once you’ve clicked the three point measurement icon(shaped like a T), zoom into the area you are interested in measuring.
Once the desired measurement has been identified, click on the image to select two points on the more well defined edge of the area of interest, and then select a third point on the parallel edge across the gap.
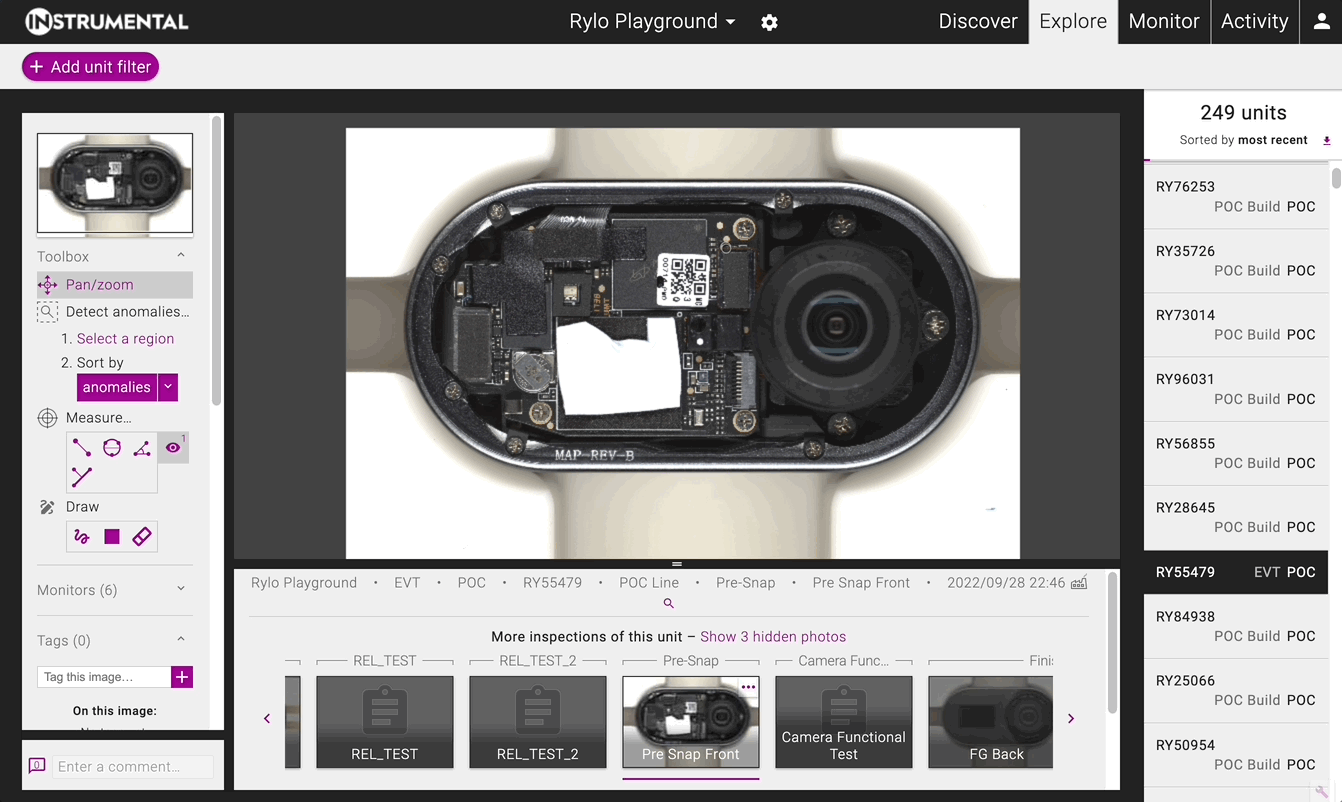
After selecting three points in the measurement, give the measurement a unique name. (Measurements with the same name are not currently supported within the Instrumental app.)
Automate a Measurement
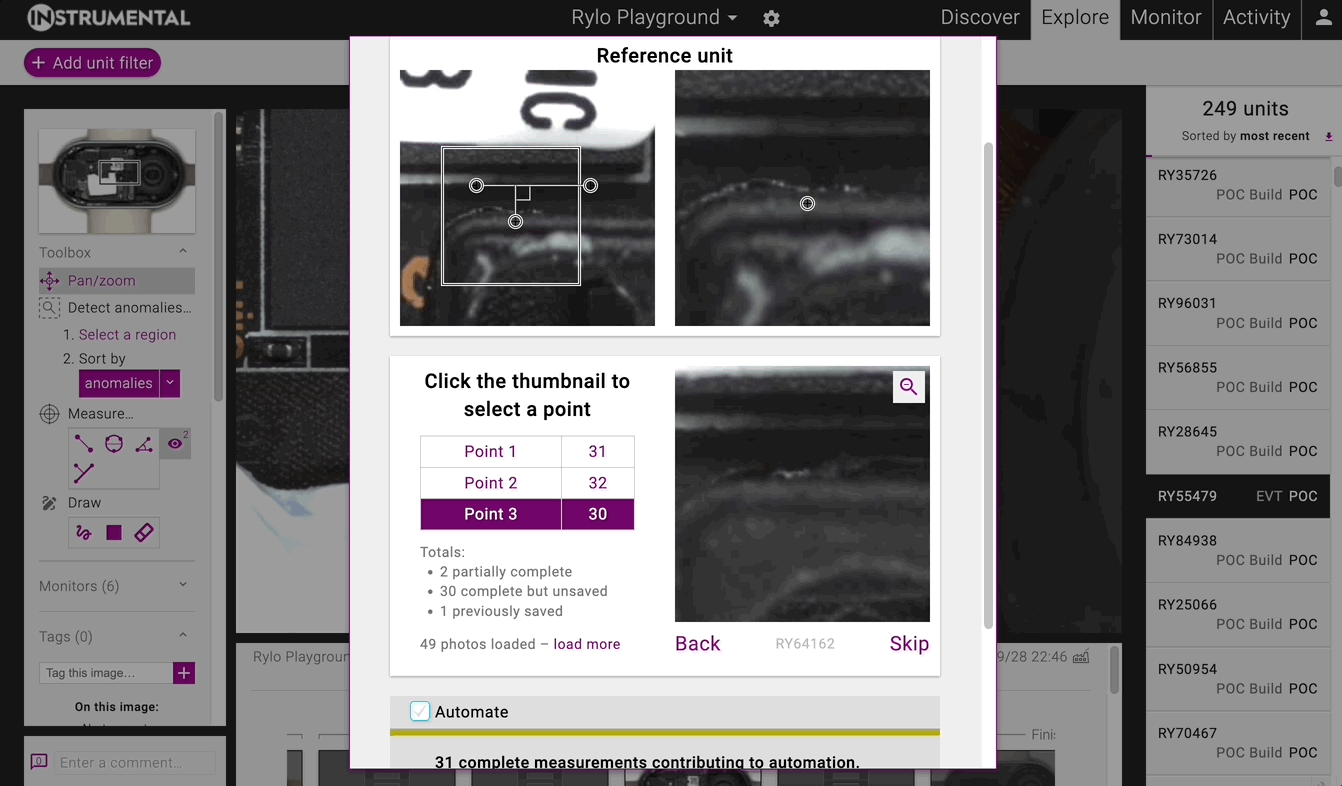
Three point gap measurements and circles measurements can be automated in the Instrumental application, allowing engineers to quickly gather measurement data on new and old units built and perform failure analysis. To automate a measurement, click the “+” icon in the measurement tooltip, to the right of the measurement name.
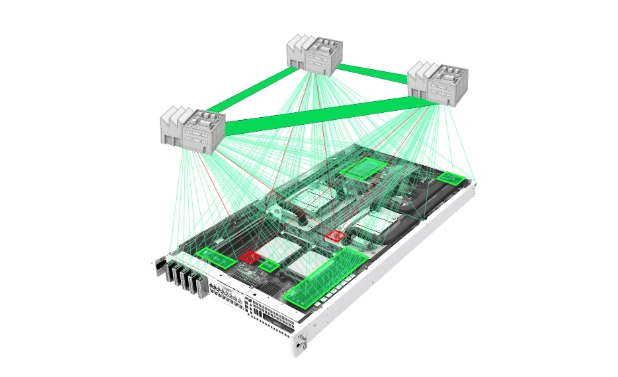
The Automated Measure modal will appear, and populate with other example units that the system will use to train the measurement. Click on the corresponding “Point 1” on the example unit at the bottom of the modal, in order to train the system on where to find that specific edge. Once that point has been labeled, another example unit will automatically populate in the modal for labeling. Continue to choose “Point 1” on successive example units until all 49 units for “Point 1” have been labeled.
Once “Point 1” has been completed, repeat the same process for “Point 2” and “Point 3”.
The Automated Measurement can be trained using as few as 30 fully labeled units. Users can label up to 50 units for greater accuracy.
After all points have been fully labeled, scroll down to the bottom of the modal and click “Automate”.
Then, choose how long to backdate the measurement. The system will pick the maximum allowed backdating by default.
Tips for Choosing where to Measure
When you create a measurement, use these two recommended best practices in order to ensure that the measurement performs as expected.
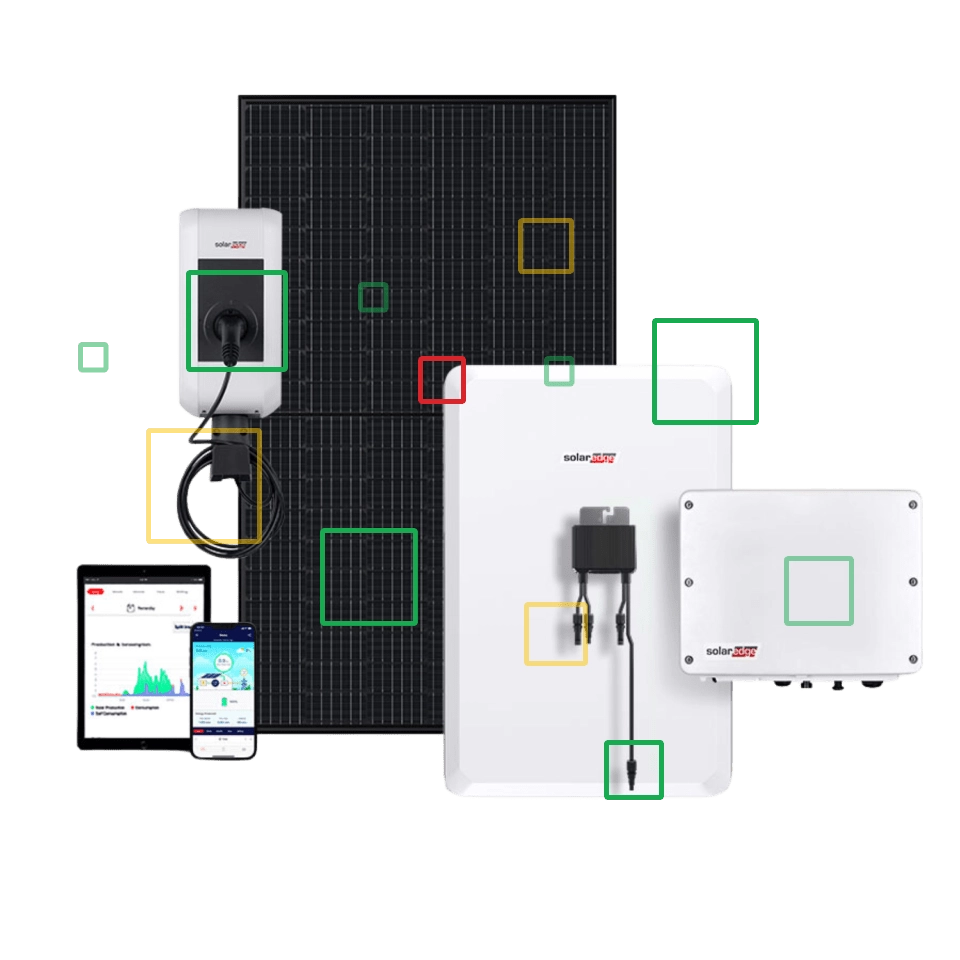
- Parallel Gaps – Make sure that the measured gap includes two mostly parallel edges. If the gap is not parallel, there is a risk that the measurement could choose a different point on the edge, affecting the resulting measurement result.
- Single Gaps – Draw the gap over only one set of edges, not many. If there are multiple edges present in the Measurement field of view, the measurement may automatically find the incorrect edge, and affect the returned measurement.
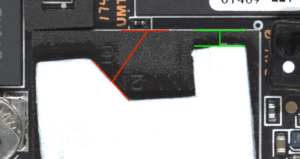
A non-parallel gap (red) and a parallel gap (green)
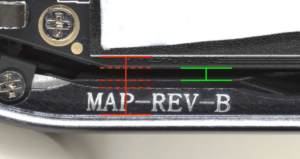
A measurement made over multiple gaps (in red) and a single gap (in green)
Measurement Features
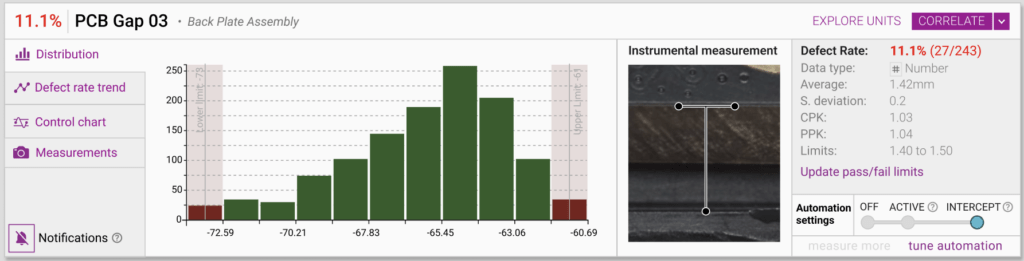
Instrumental Measurements can be used with Instrumental’s Correlations and SPC and Control Charts Features. In order to access these features for Measurements, enter the Metrics page, found under the Monitors tab in the upper right hand corner of the application.
Specific Measurements can be found by using the “Test Name” filter on the left hand side of the metrics page. Each Measurement has a dedicated Metrics Card, used to access the Measurement Histogram, SPC information, Control Chart, and the direct link to correlate the chosen measurement.
For more detail on how these features work, see the Correlations and SPC and Control Charts page.
Intercepting Measurements Live on the Line
Once a Measurement has been automated and validated, a measurement can be used to evaluate go/no-go live on the line using Instrumental Station Hardware.
Simply choose an upper and lower side limit on the metrics page by clicking “Set pass/fail limits” on the Measurement Metrics card.
Once the limits for the Measurement are set, the Measurement can be set to catch failing units live on the line. On the Metrics page, navigate to the Measurement of interest’s Metrics Card, and toggle the Automation Settings to “Intercept”. Once the button has been toggled, the station will alert the operator that the unit has failed the measurement intercept.
Pausing and Deleting Automatic Measurements
Pausing a Measurement is possible through the Metrics page – simply toggle the slider from “Active” to “Off”. This ensures that the Measurement data is saved in the Instrumental application, even if it is no longer immediately relevant to the product.
Individual Measurements can be deleted in the application on the Explore page, using the Trash Can icon on the Measurement name card.
Deleting the full automatic measurement is not currently available for all users. If there is a measurement that needs to be fully deleted from the application, reach out to an Instrumental Customer Success Manager or a Solutions Architect.